A 403 Forbidden error is an HTTP status code that indicates a web server understands the request but is refusing to fulfill it. This typically happens when access to a resource is restricted due to permissions, misconfigured settings, or security policies on the server.
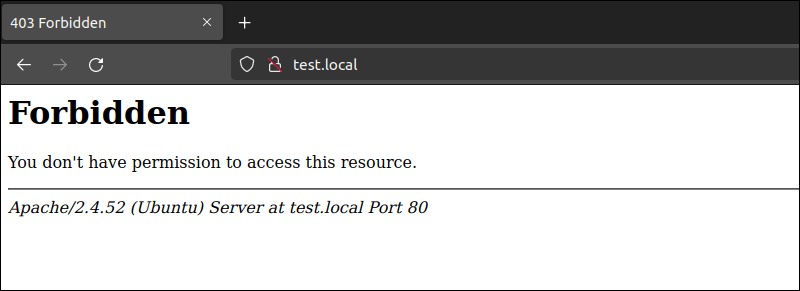
Encountering a 403 Forbidden error can be confusing, but understanding its causes is the first step toward resolving it. In this article, we’ll explore what triggers this error and provide practical solutions to help you quickly regain access to the requested resource.
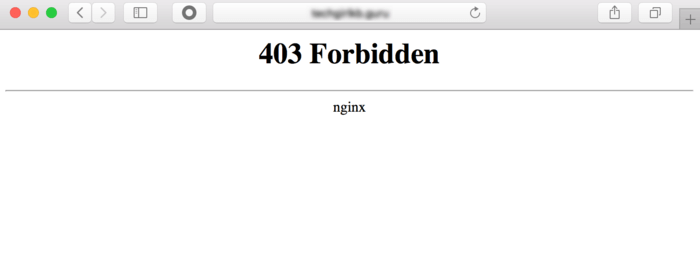
Here are the common causes that can lead to a 403 Forbidden error:
- Access configuration: Server or client-side misconfigurations can result in access being denied.
- Web Application Firewall (WAF) violations: Requests that violate a WAF rule, whether it’s for all Cloudflare domains or a specific zone, can result in a 403 error. Additionally, SSL connections to domains or subdomains without the correct SSL certificates can trigger this issue.
- .htaccess file issues: Corrupt or improperly configured .htaccess files can trigger this error.
- File and folder permissions: Incorrect permissions on files or directories can block access, leading to a 403 error.
- Missing index page: If the website’s homepage isn’t correctly named (e.g., index.html or index.php), the server may return a 403 error.
- IP Address issues: An incorrect or outdated IP address for the domain can lead to restricted access, though this is often DNS-related.
- Malware: Malware can corrupt important files, such as .htaccess, causing 403 errors. It’s crucial to remove malware before restoring affected files.
- Security plugin conflicts: Improperly configured or incompatible security plugins can prevent access.
- Changed web page links: Modifications to page URLs can cause 403 errors if users try to access outdated links.
What Is the 403 Forbidden Error?
The 403 Forbidden error is an HTTP status code that means the server understands the request but won’t allow access. Unlike the 404 Not Found error, which means the resource doesn’t exist, the 403 error indicates that access to an existing resource is blocked.
Error variations
- 403 Forbidden
- Forbidden
- Error 403
- HTTP Error 403.14 – Forbidden
- HTTP 403
- Forbidden: You don’t have permission to access the site using this server
- Error 403 – Forbidden
- HTTP Error 403 – Forbidden
- Access Denied – You don’t have permission to access
How to fix the 403 Forbidden error
If you come across a 403 Forbidden error on your website, either through a website audit or by stumbling upon it, there’s no need to worry. Here are 10 effective methods to resolve this issue and keep your site running smoothly.
Clear your browser cache and cookies
The 403 Forbidden error can sometimes occur due to issues with your browser’s cache and cookies. When a website’s link changes, the cached version might conflict with the current version, causing access issues. Additionally, cookies, which store your preferences and details, can sometimes contribute to this error by interfering with your browsing experience.
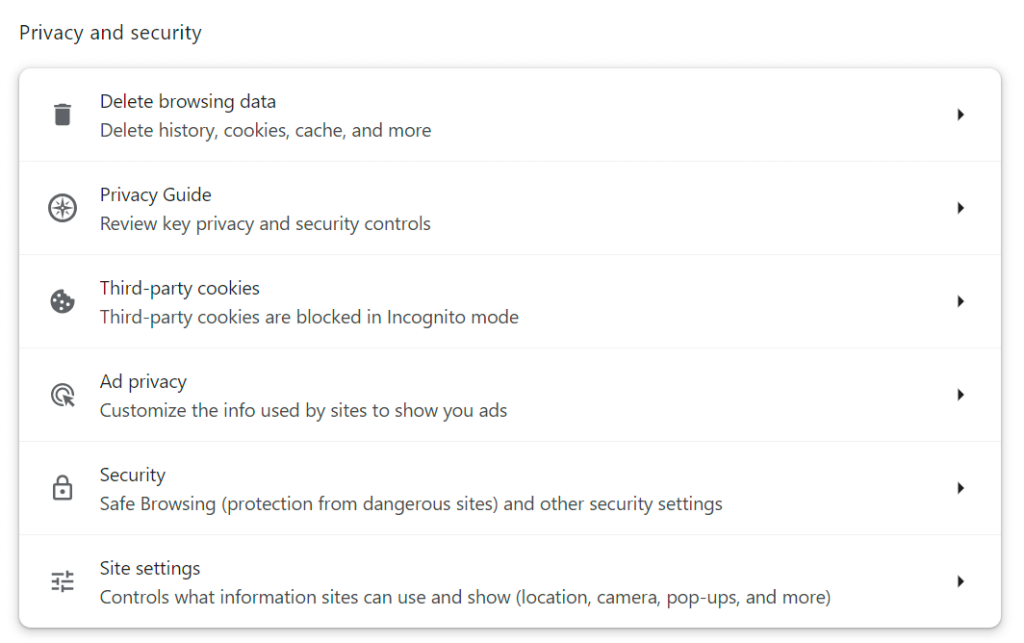
To fix this, delete your browser cache and cookies by following these steps (Chrome):
- Open your browser and go to the settings menu.
- Navigate to privacy and security settings.
- Select “Delete browsing data” and set the time range to “All time.”
- Check “Cookies and other site data” and “Cached images and files.”
- Click “Delete data.”
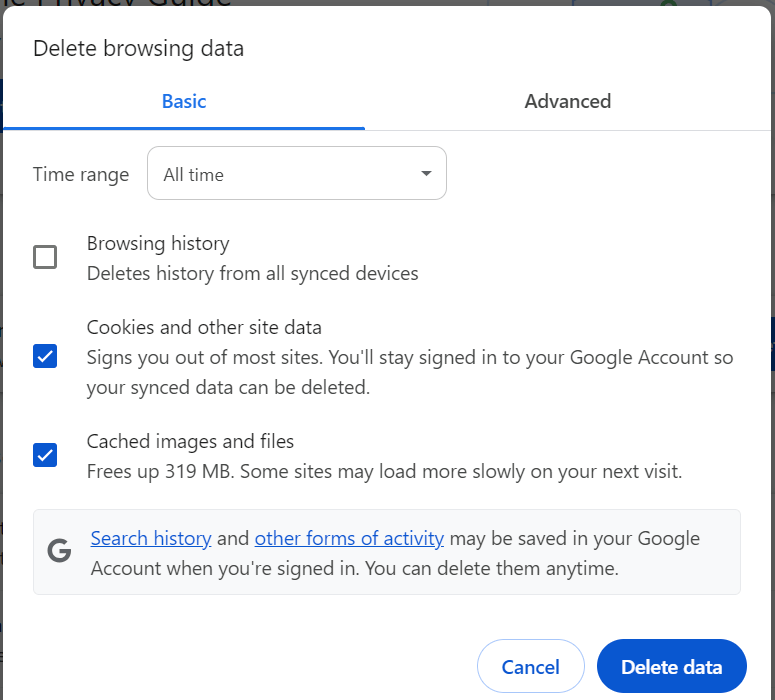
Once completed, reload the website to see if the error has been resolved.
Check the .htaccess File
The .htaccess file is a crucial server configuration file that can impact website access. If this file is corrupted or misconfigured, it might trigger a 403 Forbidden error. To address this issue, follow these steps:
- Use your hosting control panel or an FTP client to locate the .htaccess file in your website’s root directory.
- Download a backup of the existing .htaccess file to your local computer.
- Delete the current .htaccess file from the server.
- Create a new .htaccess file with no file extension.
- Add the following code to the new file and save it:
# Enable URL Rewriting
RewriteEngine On
# Rewrite rule to redirect requests to index.php
RewriteCond %{REQUEST_FILENAME} !-f
RewriteCond %{REQUEST_FILENAME} !-d
RewriteRule ^(.*)$ index.php?/$1 [L]
For WordPress sites, you can also regenerate the .htaccess file by going to the WordPress dashboard, selecting Settings → Permalinks, and clicking Save Changes without making any modifications. This action will create a new .htaccess file.
Temporarily Disable VPN
A virtual private network (VPN) might cause a 403 Forbidden error if the website blocks access from VPN servers due to security or regional restrictions. To determine if your VPN is the issue, try temporarily disconnecting it and accessing the web page again. If the error disappears, consider switching to a different VPN server or contacting your VPN provider for further assistance.
Temporarily Disable CDN
A content delivery network (CDN) helps speed up website performance by caching and delivering content from servers close to the user. However, if a CDN caches a 403 Forbidden error due to issues like file permissions or IP blocking, it can cause access problems.
To determine if the CDN is the source of the error, temporarily disable it and check if the issue persists.
If disabling the CDN resolves the error, keep it off and contact support for further troubleshooting.
Scan for Malware
Malware infections can corrupt your website files and trigger a 403 Forbidden error by injecting malicious code. To address this, follow these steps:
- Access your hosting control panel or security dashboard and locate the malware scanner tool.
- Run a scan to check for compromised files. If malware is detected, follow the tool’s instructions to remove it.
If your hosting provider doesn’t offer a malware scanner, consider using malware plugins for your CMS to identify and eliminate malicious software.
Reset File and Directory Permissions
File and directory permissions determine how users can read, write, and execute data on your website. Incorrect permissions can lead to a 403 Forbidden error. To fix this issue:
- Access your hosting control panel and find the tool or option for adjusting file ownership and permissions.
- Alternatively, use an FTP client like FileZilla to manually reset permissions. Set directories to 755 and files to 644.
After resetting the permissions, check your website to see if the error is resolved. If the problem persists, further investigation may be needed.
Disable CMS (WordPress) Plugins
Incompatible or problematic WordPress plugin might be the cause of 403 forbidden error. Here’s how to check and fix plugin-related issues:
- Manually via FTP or File Manager:
- Access your website’s files via FTP or your hosting control panel’s file manager.
- Navigate to the
wp-contentfolder in thepublic_htmldirectory. - Rename the
pluginsfolder todisabled-pluginsto deactivate all plugins at once.
After renaming the folder, check if the error persists. If the error is resolved, reactivate the plugins one by one through the WordPress dashboard to identify the problematic plugin. Update or remove the faulty plugin to fix the issue.
Update Nameservers
When you migrate to a new hosting provider, one critical step is updating your domain’s nameservers. If this step is overlooked, your domain might still be pointing to your previous host, causing a 403 error as the server attempts to access outdated information. This misalignment can prevent proper access to your website.
To resolve this, access your domain registrar’s control panel and update your domain’s nameservers to point to your new hosting provider. This ensures that all traffic is directed correctly to your new server, eliminating the risk of encountering a 403 error due to outdated configurations.
Upload an Index Page
A common cause of the 403 Forbidden error is the absence of a proper index page in your website’s root directory. Web servers typically require a homepage named either index.html or index.php to serve as the default page when visitors access your domain. If this file is missing or incorrectly named, it can trigger the 403 error.
Here’s how to fix it:
- Rename Your Homepage: Check if your homepage file is named something other than
index.htmlorindex.php. If it is, rename it accordingly using an FTP client or your hosting provider’s file manager. - Upload an Index Page: If you don’t have an index page, create a new file named
index.htmlorindex.phpin thepublic_htmlorhttpdocsdirectory. This file will serve as your website’s default landing page. - Redirect to Your Homepage: If your homepage has a different name, you can set up a redirect in the
.htaccessfile. Insert the following code snippet to redirectindex.htmlorindex.phpto your existing homepage:
Redirect /index.html /homepage.htmlReplace homepage.html with the actual name of your file.
These steps will help ensure that your website loads correctly without triggering a 403 Forbidden error due to missing or misconfigured index pages.
Web Application Firewall (WAF) Violations
Requests that violate a Web Application Firewall (WAF) rule, whether it’s for all Cloudflare domains or a specific zone, can result in a 403 Forbidden error. SSL connections to domains or subdomains without the correct SSL certificates can also trigger this issue.
Here’s how to fix it:
- Review and Adjust WAF Rules: Access your WAF settings through your hosting provider’s control panel or Cloudflare dashboard. Review the security rules in place and identify any that might be too restrictive. If you find a rule that’s causing legitimate requests to be blocked, consider adjusting or disabling it. For Cloudflare users, this can be done in the Firewall Rules section.
- Whitelist Safe IPs: If the WAF is blocking specific IP addresses that you know are safe, whitelist them to prevent the 403 error. This is particularly useful for internal or frequently used IP addresses.
- Correct SSL Certificate Issues: Ensure that all your domains and subdomains have the correct SSL certificates installed. Mismatched or missing SSL certificates can cause secure connections to fail, leading to a 403 error. You can check and manage SSL certificates through your hosting control panel or by contacting your SSL provider.
- Check Firewall Logs: Analyze the WAF logs to identify the specific rules being violated. This will help you understand what’s causing the issue and allow you to fine-tune your WAF configuration to prevent false positives without compromising security.

Leave a Reply